Translating your drawing from one CAD Standard to another – fast.
Data management is huge deal when working with AutoCAD and Civil 3d. In this case, I am working on translating our Survey Team’s CAD Layers to a large City’s CAD Layers. We want this to run as a script so it is very easy for our team members to run the process.
I start this process with a planning step first. This sounds pretty boring, but it is essential work. I want to know exactly what needs to be done before I start doing it. Then I will encode this into a script and the LAYTRANS command.
Step 1) I start a new drawing with our survey template, and type in LAYER. Select a layer from the list, then key in CTRL + A. Now that all layers are selected, press CTRL + C to copy the layers.
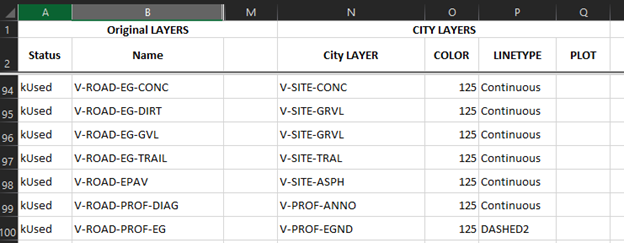
Step 2) Start a new excel file and paste the layers you previously copied. Now you have a nice listing of all your layers. Now it’s time to go line-by-line and determine what each layer needs to be translated to. You may find you just want to delete some layers.

Step 3) Now that I know I’m going to do with each layer, I need to start working in CAD to achieve the desired effect. We will be doing this with many drawings over time, so I want the result to be scripted as much as possible. That way the survey team can just run the script and check the output.

I have identified a large number of layers which won’t have anything on them for this type of survey. They are usually used for staking drawings. I will remove these layers. I’m also going to purge unused blocks.
Here I have started writing my script. I usually write these as a series of lisp statements. In this case below, I am purging blocks and then deleting a layer from our template that will not be used in this type of survey.

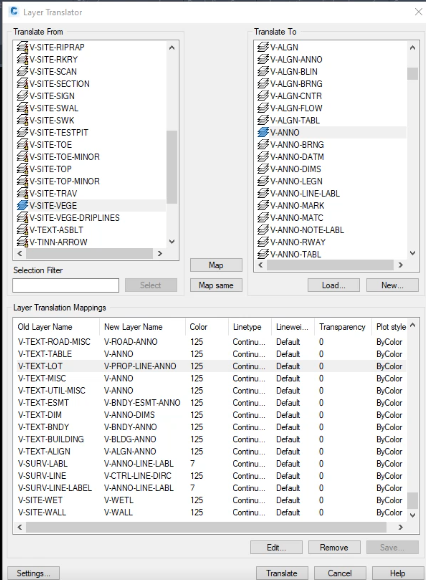
Now its time to setup the translation matrix with the LAYTRANS command. This is straightforward, you go through each layer on the left (current drawing), vs the panel on the right which is the one you are translating to.

You can see in the bottom pane what the translation will do. Old Layer Name – New Layer Name and what that layer will look like. Don’t forget to save while configuring this! If you accidently exit, ya gotta start over. So, you need to plan so you can do this in one shot.
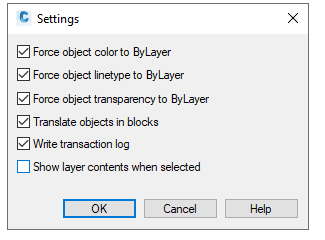
Make time to check out the settings. If you look at the first 4 shown below, its giving you the option to do a SETBYLAYER command right in the layer translator. A nice feature!

Now that we have created and saved our translation matrix, its time to add two more lines to our script.

What is (acet-laytrans) ? This is a lisp statement to run your translation. You can of course, bring up your translation normally with the LAYTRANS command, but this allows us to script the whole process. Sweet and fast. We must precede this with the statement (arxload “Laytrans”) to ensure the laytrans functions are loaded in CAD.
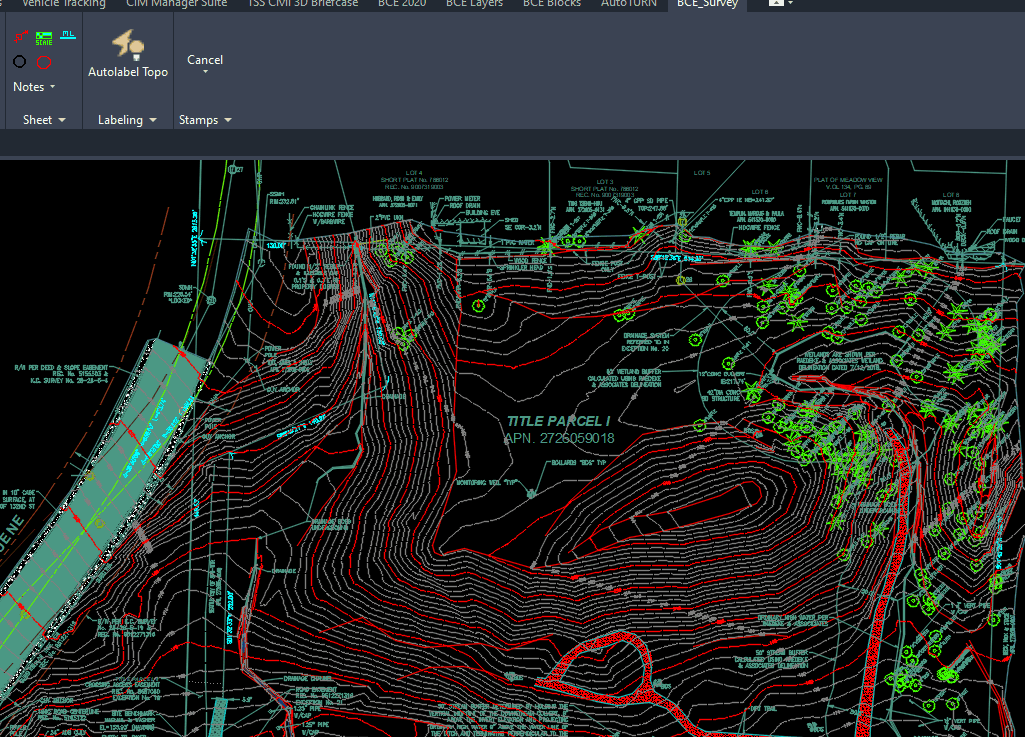
We embedded a link to this script in our menu system. Check out the results below.


Thank you for your articles. I find them very helpful. Could you help me with something?
I possibly could. You can email me at hello@c3dk.com